|
|
- Linux servers - Exercise 1
- ==============
-
- *Disclaimer:*
- --------------
-
- This exercise is a part of [Linux Server Administration (ICT4TN021, spring 2018) // Linux-palvelimet (ICT4TN021, kevät 2018)](http://www.haaga-helia.fi/fi/opinto-opas/opintojaksokuvaukset/ICT4TN021) school course organized as a part of Information Technology studies in Haaga-Helia university of Applied Sciences, Helsinki, Finland. Course lecturer [Tero Karvinen](http://terokarvinen.com/) has defined the original assignment descriptions in Finnish presented in this document in English. Answers and translations have been written by Pekka Helenius (me, ~ Fincer).
-
- *Table of contents:*
- --------------
-
- - [a) **Linux LiveUSB** Create your own Linux USB live stick. Try it out on a non-school computer. This section does not require installation of Linux. However, if you decided to install Linux, you should take proper backups first.](https://github.com/Fincer/linux-server-setup/blob/master/exercises/h1.md#a-create-your-own-linux-usb-live-stick-try-it-out-on-a-non-school-computer-this-section-does-not-require-installation-of-linux-however-if-you-decided-to-install-linux-you-should-take-proper-backups-first)
-
- - [Alternative 1 - Rufus (Windows, GUI-based)](https://github.com/Fincer/linux-server-setup/blob/master/exercises/h1.md#alternative-1---rufus-windows-gui-based)
-
- - [Comparing checksums](https://github.com/Fincer/linux-server-setup/blob/master/exercises/h1.md#comparing-checksums)
-
- - [Alternative 2 - dd command (Linux, CLI-based)](https://github.com/Fincer/linux-server-setup/blob/master/exercises/h1.md#alternative-2---dd-command-linux-cli-based)
-
- - [b) **Hardware components** List hardware components of your new Linux computer (sudo lshw -short -sanitize).](https://github.com/Fincer/linux-server-setup/blob/master/exercises/h1.md#b-list-hardware-components-of-your-new-linux-computer-sudo-lshw--short--sanitize)
-
- - [c) **Program installation** Install three new programs which are new to you. Try them out in their main target environment and primary use.](https://github.com/Fincer/linux-server-setup/blob/master/exercises/h1.md#c-install-three-new-programs-which-are-new-to-you-try-them-out-in-their-main-target-environment-and-primary-use)
-
- - [Thunar](https://github.com/Fincer/linux-server-setup/blob/master/exercises/h1.md#thunar)
-
- - [Gedit](https://github.com/Fincer/linux-server-setup/blob/master/exercises/h1.md#gedit)
-
- - [GParted](https://github.com/Fincer/linux-server-setup/blob/master/exercises/h1.md#gparted)
-
- - [Installation via official package repositories](https://github.com/Fincer/linux-server-setup/blob/master/exercises/h1.md#installation-via-official-package-repositories)
-
- - [Installation via local packages or from source code](https://github.com/Fincer/linux-server-setup/blob/master/exercises/h1.md#installation-via-local-packages-or-from-source-code)
-
- - [Uninstallation of packages](https://github.com/Fincer/linux-server-setup/blob/master/exercises/h1.md#uninstallation-of-packages)
-
- - [Differences between Linux distributions](https://github.com/Fincer/linux-server-setup/blob/master/exercises/h1.md#differences-between-linux-distributions)
-
- - [d) **Licenses** Which licenses have been used in the programs of your choice? Explain briefly which kind of rights and duties these licenses have.](https://github.com/Fincer/linux-server-setup/blob/master/exercises/h1.md#d-which-licenses-have-been-used-in-the-programs-of-your-choice-explain-briefly-which-kind-of-rights-and-duties-these-licenses-have)
-
- - [e) **Alternative open source programs** List programs you use (MS Word, for instance), purpose of these programs (for instance, text editing) and introduce equivalent open source Linux program (for instance, LibreOffice Writer). List closed source programs even if they do not have open source equivalent for Linux.](https://github.com/Fincer/linux-server-setup/blob/master/exercises/h1.md#e-list-programs-you-use-ms-word-for-example-purpose-of-these-programs-for-example-text-editing-and-introduce-equivalent-open-source-linux-program-for-instance-libreoffice-writer-list-closed-source-programs-even-if-they-do-not-have-open-source-equivalent-for-linux)
-
- - [f) **File backups** Optional extra task: backup your files (you can use an external USB storage, for instance)](https://github.com/Fincer/linux-server-setup/blob/master/exercises/h1.md#f-optional-extra-task-backup-your-files-you-can-use-an-external-usb-storage-for-instance)
-
- - [fstransform - convert existing file system to another format](https://github.com/Fincer/linux-server-setup/blob/master/exercises/h1.md#fstransform---convert-existing-file-system-to-another-format)
-
- --------------
-
- **a)** Create your own Linux USB live stick. Try it out on a non-school computer. This section does not require installation of Linux. However, if you decided to install Linux, you should take proper backups first.
- --------------
-
- **Answer:** I did this with [Rufus Windows application](https://rufus.akeo.ie/) on Microsoft Windows 7 which was run inside [Oracle VirtualBox](https://fi.wikipedia.org/wiki/VirtualBox) as a virtual machine. Alternative methods include [UNetbootin](https://unetbootin.github.io/), [ISO Image Writer](https://github.com/KDE/isoimagewriter) or `dd` command (default location on Linux: /usr/bin/dd) which is a part of [Coreutils](http://www.gnu.org/software/coreutils/coreutils.html). Rufus allows you to create a live USB stick using either ISO or DD method which differ from each other, as the developer has explained [on his GitHub site](https://github.com/pbatard/rufus/issues/843#issuecomment-255680876).
-
- Let's take a detailed look for two of these approaches: Rufus on Windows 7 and `dd` command on Linux (any Linux distribution applies here).
-
- #### Alternative 1 - Rufus (Windows, GUI-based)
-
- You can use either Windows 7 or 10 (any student/enterprise/server subversion applies here). You can run Windows either in a virtual machine or as physically installed in your mass media storage (SSD/HDD). Whichever method you choose to run Windows, it doesn't really matter. The most important part is that you have a working operating system.
-
- **1.** Launch Microsoft Windows
-
- **2.** Download Rufus application from [here](https://rufus.akeo.ie/), under the title "Download"
-
- **3.** You can use either portable or installable version of Rufus. In the following example, we use portable version v. 2.18.
-
- **4.** Download any Linux distribution you prefer. In further parts, Debian-based Ubuntu 16.04.3 LTS is used.
-
- What comes to alternative download methods, you can choose either ISO image file (downloaded directly from servers) or distributed torrent method. Torrent method usually requires a client application (such as [Transmission](https://transmissionbt.com/download/)) to work correctly.
-
- The Linux distribution of choice can be anything you prefer in your working environment and which requirements you have set up for your Linux server environment.
-
- Let's download a widely used Xubuntu 16.04.3 LTS (x86_64 processor architecture), which is based on Ubuntu 16.04.3 LTS but uses XFCE desktop environment instead of Unity. In Ubuntu version syntax, 16 refers to release year (2016), 04 refers to release month (April), 3 is subversion and LTS stands for Long-Term Support (preferred in server environments).
-
- [Xubuntu 16.04.3 LTS - Torrent download](http://cdimage.ubuntu.com/xubuntu/releases/16.04.3/release/xubuntu-16.04-desktop-amd64.iso.torrent)
- [Xubuntu 16.04.3 LTS - ISO image file directly from a server - 1.2G](http://cdimage.ubuntu.com/xubuntu/releases/16.04.3/release/xubuntu-16.04-desktop-amd64.iso)
-
- #### Comparing checksums
-
- If you wanted to make sure the ISO image you just downloaded is valid, you should check its checksum (mainly for security reasons). In this way you make sure that no malicious party has altered the image you trust and the download process has succeeded.
-
- You should take a closer look on `sha256sum` and `md5sum` values of your ISO image file. The value must match the one which is published on the Ubuntu download site ([sha256sum](http://cdimage.ubuntu.com/xubuntu/releases/16.04.3/release/SHA256SUMS), [md5sum](http://cdimage.ubuntu.com/xubuntu/releases/16.04.3/release/MD5SUMS)).
-
- **On Linux:** check checksums with commands `sha256sum xubuntu-16.04-desktop-amd64.iso` and/or `md5sum xubuntu-16.04-desktop-amd64.iso`
-
- **On Windows:** Use [Microsoft File Checksum Integrity Verifier](https://www.microsoft.com/en-us/download/details.aspx?id=11533) or check a CertUtil-based solution [given on superuser.com](https://superuser.com/questions/245775/is-there-a-built-in-checksum-utility-on-windows-7/898377#898377)
-
- **NOTE:** Checking checksums is highly recommended. For instance, Linux Mint network servers were hacked due to outdated server software in 2016, resulting to maliciously injected ISO images uploaded by hostile attackers.
-
- In addition, the Linux Mint forum software was affected, as well (user credentials leaked). More about the incident is explained [on Linux Mint blog](https://blog.linuxmint.com/?p=2994).
-
- **5.** Plug in an empty and large enough USB stick into your computer (4GiB should be sufficient). It is highly recommended that you have formatted the stick in advance because Rufus overwrites any existing files existing in the USB stick in order to place required Linux files in the stick. If your stick contained any important files, they should be moved from the stick to somewhere safe location before proceeding here.
-
- **6.** Once the stick is emptied (and probably formatted), launch Rufus application. Select the USB stick as a target device in *Device* menu. All other settings can be left in their default values. Choose downloaded Xubuntu 16.04.3 LTS ISO image file from the dropdown menu located at the right of **Create a bootable disk using** part. The dropdown menu is presented as a disc icon without any texts.
-
- **7.** Click *Start*, choose ISO method as a writing method once asked. Read the warnings. If all steps have been successfully accomplished so far, proceed with the writing operation.
-
- **8.** Wait until the ISO image file has been written into the USB stick. Once done, reboot your computer with the USB stick attached.
-
- Immediately after the computer has rebooted, press a button which you can access your BIOS/UEFI/Boot options menu with. Choose the Xubuntu 16.04.3 LTS USB stick (which should appear in the boot list). Start the operating system boot-up process bt selecting **Try without installing** option (this step varies between Linux distribution. More generally, you can also choose **Install 'whateverdistro'** option and select installation on the live USB Linux desktop environment). Wait until the operating system has been booted up. Start installation and follow the instructions.
-
- The installation process is not defined in detail here because installation steps varies from Linux distribution to distribution. However, basic principle is to install the operating system with good and strong passwords. Encrypted home folder or HDD/SSD partition options should also be considered.
-
- After you have successfully installed Linux, detach the live USB stick and reboot your computer. You should be able to access the installed Linux distribution without the USB stick.
-
- When writing and applying passwords, please pay attention to correct keyboard layouts. In my case, I use a Swedish (Finnish) keyboard layout which differs from the default en_US layout. Therefore, mistyping characters can easily happen. Many Linux distributions allow you to change the keyboard layout during the installation process. Unless you're not able to do it in installation window, you can change the keyboard layout temporarily by executing `setxkbmap fi` (`fi` = finnish layout, adapt this parameter to your language preferences) in a local shell environment (NOTE: graphical environment is required for `setxkbmap` command since it's a part of graphical X11 environment!).
-
- You can open up a local shell by opening a terminal emulator while running Linux from your USB stick. NOTE: changing passwords must be done before writing them in the installation steps!
-
- #### Alternative 2 - dd command (Linux, CLI-based)
-
- In case you use any Unix-based operating system (Linux, GNU/Linux, Apple MacOS, FreeBSD), you can create a USB live stick by using shell-based `dd` command. This method does not require a graphical desktop environment.
-
- **NOTE:** Commands on Apple MacOS may not be exactly equal to Linux ones if you use extra parameters in the following commands.
-
- The following instructions assume that you have only a command line environment and you have a working network connection.
-
- **1.** At first, you need to download an ISO image of your Linux distribution of choice. There are usually two options:
-
- - download ISO image from a centralized server or
-
- - download ISO image using torrent protocol.
-
- In the following steps, we download Xubuntu 16.04.3 LTS (x86_64).
-
- **Alternative a. Centralized server:**
- - requires that `wget` command exists in the system
- - download the ISO image with the command:
-
- ```
- wget --directory-prefix=$HOME --show-progress http://cdimage.ubuntu.com/xubuntu/releases/16.04.3/release/xubuntu-16.04-desktop-amd64.iso
- ```
-
- **Alternative b. Torrent download:**
- - requires that `transmission-cli` command exists in the system
- - download the ISO image with the command:
-
- ```
- transmission-cli -w $HOME http://cdimage.ubuntu.com/xubuntu/releases/16.04.3/release/xubuntu-16.04-desktop-amd64.iso.torrent
- ```
-
- **2.** Plug in an empty and large enough USB stick into your computer (4GiB should be sufficient). It is highly recommended that you have formatted the stick in advance but you can format the stick with `fdisk` command, as well ([util-linux](https://www.kernel.org/pub/linux/utils/util-linux/)).
-
- When using fdisk, please follow [these instructions](https://www.cyberciti.biz/faq/linux-how-to-delete-a-partition-with-fdisk-command/), for instance. In case you have important files to be copied from your USB stick, copy the files with the following command sequence. We assume that the stick is not yet mounted on the system. Command sequence is expected to be executed with the default user (`UID` = 1000) which belongs to the default user group (`GID` = 1000).
-
- Correct USB stick device name and partition number (`/dev/XdYZ`) must be find out in advance by executing command `sudo fdisk -l`.
-
- - `Y` stands for the device's alphabetical ID, `Z` stands for partition number (`/dev/sda1`, for instance). `X` can have value `h` (IDE-based HDD/SSD's) or `s` (SATA-based HDD/SSD's). Newer NVMe-based storage solutions such as Samsung EVO series 860/960 use syntax `/dev/nvme0n1p1` in which `1` stands for the device number and `p1` stands for the partition number.
-
- ```
- sudo mkdir -p /mnt/livestick && \
- mkdir $HOME/livestick-backup && \
- sudo mount /dev/sdXY /mnt/livestick && \
- sudo mv /mnt/livestick/* $HOME/livestick-backup/ && \
- sudo chown -R 1000:1000 $HOME/livestick-backup
- ```
-
- **NOTE:** If you have any USB stick partitions mounted already on the system, you should **not** use `/mnt/livestick` location in above commands. Instead, use the path you can extract for the correct USB stick partition with `mount` command.
-
- **3.** When you have backed up your important files earlier stored in the USB stick, you have confirmed the USB stick is empty and you have successfully downloaded your Linux distribution ISO image, you can start proceeding with the writing operations.
-
- **NOTE:** You must be extra careful with `dd` command. If misused, the command can destroy any data you have in your HDD/SSD or in any storage device. Recovering files is a headache and you really don't want to end up having one! One key principle is to triple check all locations given for the `dd` command and check that used locations are in correct places (so that input and output operations are being executed for correct devices and the devices don't mix up).
-
- **4.** Let's begin with Xubuntu 16.04.3 LTS USB writing operations. In this section we assume that you have successfully downloaded the ISO image and you definitely know the correct path for your USB stick device (syntax: `/dev/sda`).
-
- **NOTE:** I don't refer to USB stick partition path (syntax: /dev/sda1). The device path syntax is as stated: `/dev/sda`, `/dev/sdb`, etc. `dd` command is executed as the root user (Linux main user/super user).
-
- `dd` command doesn't confirm the command syntax is correct so you must write it correctly in the beginning. If you are not sure about the correct syntax, please contant an expert.
-
- The command syntax (**NOTE:** not likely the exact command in your environment!) is as follows:
-
- ```
- sudo dd status=progress if=$HOME/xubuntu-16.04-desktop-amd64.iso of=/dev/sdb
- ```
-
- where `/dev/sdb` is your USB stick as seen on Linux system. **Use correct, your exact device identifier instead of the one shown above**.
-
- If you want more instructions how to use the `dd` command, it is recommended to read the following wiki, for instance: [Wikipedia - dd (Unix)](https://en.wikipedia.org/wiki/Dd_(Unix))
-
- **5.** Wait until the ISO image file has been written into the USB stick. Once done, reboot your computer with the USB stick attached. Immediately the computer has rebooted, press a button which you can access your BIOS/UEFI/Boot options menu with. Choose the Xubuntu 16.04.3 LTS USB stick (which should appear in the boot list). Start the operating system boot-up process bt selecting **Try without installing** option (this step varies between Linux distribution. More generally, you can also choose **Install 'whateverdistro'** option and select installation on the live USB Linux desktop environment). Wait until the operating system has been booted up. Start installation and follow the instructions.
-
- The installation process is not defined in detail here because installation steps varies from Linux distribution to distribution. However, basic principle is to install the operating system with good and strong passwords. Encrypted home folder or HDD/SSD partition options should also be considered.
-
- After you have successfully installed Linux, detach the live USB stick and reboot your computer. You should be able to access the installed Linux distribution without the USB stick.
-
- When writing and applying passwords, please pay attention to correct keyboard layouts. In my case, I use a Swedish (Finnish) keyboard layout which differs from the default en_US layout. Therefore, mistyping characters can easily happen. Many Linux distributions allow you to change the keyboard layout during the installation process. Unless you're not able to do it in installation window, you can change the keyboard layout temporarily by executing `setxkbmap fi` (`fi` = finnish layout, adapt this parameter to your language preferences) in a local shell environment (NOTE: graphical environment is required for `setxkbmap` command since it's a part of graphical X11 environment!).
-
- **b)** List hardware components of your new Linux computer (sudo lshw -short -sanitize).
- --------------
-
- **Answer:**
-
- `sudo lshw -short -sanitize` gives the following information (assuming that you have package `lshw` installed and commands `sudo` and `lshw` are available on the system):
-
- Detailed comments about the listed devices have been included after each terminal output line (therefore, the output is not exactly as written by the command to stdout/output).
-
- | Hardware component | Description / Short analysis |
- |------------------------------------------------------------------------------------------------------------------------------------------------------------------- |------------------------------------------------------------------------------------------------------------------------------------------------------------------------------------------------------------------------------------------------------- |
- | system N56JR (ASUS-NotebookSKU) /0 busN56JR | Computer manufacturer & model identifier |
- | /0/0,memory 64KiB BIOS | Memory size of motherboard's BIOS firmware, 64 kibibytes |
- | /0/8,processor,Intel(R) Core(TM) i7-4700HQ CPU @ 2.40GHz | Processor manufacturer, model and clock rate |
- | /0/8/9 memory 1MiB L2 cache | Level 2 cache of the processor, size of 1 mebibytes |
- | /0/8/a memory 256KiB L1 cache | Level 1 cache of the processor, size of 256 kibibytes |
- | /0/8/b memory 6MiB L3 cache | Level 3 cache of the processor, size of 6 mebibytes |
- | /0/c,memory 16GiB System Memory | Installed computer RAM memory size in gibibytes |
- | /0/c/0 memory 8GiB DIMM DDR3 Synchronous 1600 MHz (0.6 ns) | Information of RAM module 0. DIMM (dual in-line memory module), DDR3 (Double Data Rate 3), clock rate 1600 megahertz, latency 0.6 nano seconds |
- | /0/c/1 memory DIMM [empty] | Information of RAM module 1. Empty |
- | /0/c/2 memory 8GiB DIMM DDR3 Synchronous 1600 MHz (0.6 ns) | Same than RAM module 0 desribed above |
- | /0/c/3 memory DIMM [empty] | Information of RAM module 3. Empty |
- | /0/100 bridge Xeon E3-1200 v3/4th Gen Core Processor DRAM Controller | PCIe x16 bus controller |
- | /0/100/1/0 displayGK106M [GeForce GTX 760M] | Discrete graphics card Gerforce GTX 760M, belonging to PCIe x16 bus |
- | /0/100/2,display4th Gen Core Processor Integrated Graphics Controller | Secondary graphics adapter (integrated). |
- | /0/100/3,multimedia Xeon E3-1200 v3/4th Gen Core Processor HD Audio Controller | Audio controller belonging to Intel Xeon E3-1200 family |
- | /0/100/16,communication,8 Series/C220 Series Chipset Family MEI Controller #1 | [Intel Management Engine Interface controller](https://www.kernel.org/doc/Documentation/misc-devices/mei/mei.txt) |
- | /0/100/1a,bus8 Series/C220 Series Chipset Family USB EHCI #2 | [Enhanced Host Controller Interface](https://en.wikipedia.org/wiki/Host_controller_interface_(USB,_Firewire)) of Intel C220 chipset family number 2 for USB gateways |
- | /0/100/1a/1usb1busEHCI Host Controller | Host controller for the above mentioned device |
- | /0/100/1a/1/1,busUSB hub | [USB extension hub](https://en.wikipedia.org/wiki/USB_hub) splitted to multiple gates |
- | /0/100/1a/1/1/1communication,Bluetooth USB Host Controller | Bluetooth controller |
- | /0/100/1a/1/1/3multimedia ASUS USB2.0 Webcam | ASUS USB-based web camera |
- | /0/100/1b,multimedia 8 Series/C220 Series Chipset High Definition Audio Controller | Audio controller of C220 chipset |
- | /0/100/1c,bridge 8 Series/C220 Series Chipset Family PCI Express Root Port #1 | Port which operates at motherboard's North Bridge, making it possible to use PCIe devices, to track their hierarchy and opening up communication channels between them ([source](https://www.techwalla.com/articles/what-is-a-pci-express-root-port)) |
- | /0/100/1c.2bridge 8 Series/C220 Series Chipset Family PCI Express Root Port #3 | Equal to the previous device |
- | /0/100/1c.2/0,wlan0,networkAR9485 Wireless Network Adapter | WLAN network adapter Atheros AR9485. Interface identifier wlan0 which is seen by the OS commands (can be altered via changing Linux kernel boot parameters in grub/syslinux configuration files) |
- | /0/100/1c.3bridge 8 Series/C220 Series Chipset Family PCI Express Root Port #4 /0/100/1c.3/0,eth0networkRTL8111/8168/8411 PCI Express Gigabit Ethernet Controller | Ethernet controller RealTek 8111/8168/8411. Interface identifier eth0, which can be checked by using `ifconfig` command, for instance |
- | /0/100/1c.4bridge 8 Series/C220 Series Chipset Family PCI Express Root Port #5 /0/100/1c.4/0,genericRTS5227 PCI Express Card Reader | RealTek RTS5227 PCIe card reader |
- | /0/100/1d,bus8 Series/C220 Series Chipset Family USB EHCI #1 | [Enhanced Host Controller Interface](https://en.wikipedia.org/wiki/Host_controller_interface_(USB,_Firewire)) of Intel C220 chipset family number 1 for USB gateways |
- | /0/100/1d/1usb2busEHCI Host Controller | Host controller for the above mentioned device |
- | /0/100/1d/1/1,busUSB hub | [USB extension bus](https://en.wikipedia.org/wiki/USB_hub) splitted to multiple gates |
- | /0/100/1d/1/1/2busHighSpeed Hub | Centralization of high speed bus |
- | /0/100/1d/1/1/2/3,input,USB-PS/2 Optical Mouse | Optical HID mouse device attached to USB bus |
- | /0/100/1d/1/1/2/4,input,Logitech Illuminated Keyboard | HID keyboard device attached to USB bus |
- | /0/100/1f,bridge HM86 Express LPC Controller | [Low Pin Count controller](https://en.wikipedia.org/wiki/Low_Pin_Count) which attaches all low-level legacy devices to the motherboard |
- | /0/100/1f.2storage8 Series/C220 Series Chipset Family 6-port SATA Controller 1 [AHCI mode] | SATA controller of C220 chipset family for SATA-based mass media storage inputs |
- | /0/100/1f.3bus8 Series/C220 Series Chipset Family SMBus Controller | Power management [System Management Bus controller](https://en.wikipedia.org/wiki/System_Management_Bus) |
-
- P.S. If you frequently listed your hardware on a Linux computer, you should consider creating a **bash alias command** for this purpose (assuming your default shell environment is `bash`). Basic idea is to simplify commands you need to type each time you want to do something. For listing hardware, write a the following in your `$HOME/.bashrc` file (it's a hidden dotfile):
- ```
- alias listhw='sudo lshw -short -sanitize'
- ```
-
- Next time you launch a bash shell session, you should be able to list your hardware by simply executing `listhw` command, defined now in your `$HOME/.bashrc` file.
-
- If you want to create this command globally accessible for all users, you can write the above code in `/etc/bash.bashrc` file as root (or with `sudo`). Alternatively, create a file `/usr/bin/local/listhw` as root (or with `sudo`) with the following contents:
- ```
- #!/bin/bash
-
- sudo lshw -short -sanitize
- ```
-
- Use command `sudo nano /usr/bin/local/listhw` for that.
- The file is not executable by default. In order to make it executable, apply the following command:
-
- ```
- sudo chmod +x /usr/bin/local/listhw
- ```
-
- Alternative and additional commands to list hardware are `lspci` (list PCI devices), `hwinfo` (defailed output), `lsusb` (list USB devices). Availability of these commands vary and you may need to install extra packages in your Linux distribution. On Ubuntu, execute the following command:
-
- ```
- sudo apt-get update && sudo apt-get install hwinfo pciutils usbutils
- ```
-
- **c)** Install three new programs which are new to you. Try them out in their main target environment and primary use.
- --------------
-
- **Answer:**
-
- Let's install three new programs: *[Thunar](http://thunar.xfce.org/)* (file manager), *[Gedit](https://wiki.gnome.org/Apps/Gedit)* (text editor), *[GParted](http://gparted.sourceforge.net/)* (mass storage partition editor, alternative [GitHub link](https://github.com/GNOME/gparted)
- )
-
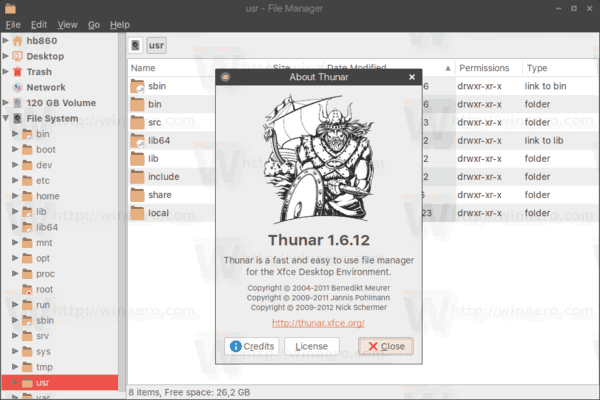
- #### Thunar
-
- 
-
- Thunar is a user-friendly and easily understandable [GTK+-based](https://en.wikipedia.org/wiki/GTK+) file manager. It's not as customizable as [Qt-based](https://en.wikipedia.org/wiki/Qt_%28software%29) [Dolphin](https://www.kde.org/applications/system/dolphin/) but sufficient for daily basic usage. Thunar is the default file manager for [XFCE desktop environment](https://en.wikipedia.org/wiki/Xfce).
-
- #### Gedit
-
- 
-
- Gedit is a simple GTK+-based text editor, targeted to [GNOME desktop environment](https://en.wikipedia.org/wiki/GNOME). Alternative text editors are, for instance, [Mousepad](https://github.com/codebrainz/mousepad), [Kate](https://www.kde.org/applications/utilities/kate/), [KWrite](https://www.kde.org/applications/utilities/kwrite/) and [Geany](https://en.wikipedia.org/wiki/Geany).
-
- #### GParted
-
- :origin()/pre00/ca96/th/pre/f/2012/205/2/b/gparted_by_sibehusky-d58gygk.png)
-
- GParted is a popular GTK+-based graphical front-end for CLI-based, GPL3-licensed [GNU Parted](http://www.gnu.org/software/parted/parted.html) back-end. Similar programs include a Qt-based [KDE Partition Manager](https://www.kde.org/applications/system/kdepartitionmanager/), targeted mainly to [KDE](https://en.wikipedia.org/wiki/Kde) and [LXQt](https://en.wikipedia.org/wiki/LXQt) desktop environments.
-
- ### Installation of Thunar, Gedit and GParted on Debian-based distributions
-
- #### Installation via official package repositories
-
- On Debian-based distributions (like Xubuntu), you can install the selected three programs with a single command, like:
-
- ```
- sudo apt-get update && sudo apt-get install -y thunar gedit gparted
- ```
-
- where `sudo apt-get update` stands for "Update and synchronize package database list to correspond with newer available program versions", `&&` stands for "If the previous command was successful, proceed with the following command", `sudo apt-get install -y` stands for "Install the following packages without confirming (-y parameter)", and finally, `thunar gedit gparted` stands for "Application names found in the available repositories listed in `/etc/apt/sources.list` file and in files in `/etc/apt/sources.list.d/` directory and which are parameters for `apt-get` command".
-
- `sudo` part before the forementioned commands stands for "Grant me temporary root privileges to execute the following commands as root". It is essential that the current user is in `sudo` group and all members of `sudo` group are allowed to gain temporary root privileges (uncomment line `%sudo ALL=(ALL) ALL` in file `/etc/sudoers` as root using `visudo` command).
-
- By executing the above command, we assume that the system has established internet connection, [Dpkg](https://en.wikipedia.org/wiki/Dpkg) works as intended (it has not already locked file `/var/lib/dpkg/lock`, for instance) and no other installation process is being executed on.
-
- You can execute the command without sudo in root terminal, but accessing root terminal is not highly recommended in server environments. In root terminal, the command would be (simply: the same command sequence without `sudo`):
-
- ```
- apt-get update && apt-get install -y thunar gedit gparted
- ```
-
- You can search for any packages with `apt-cache search package-name` command. It may not be the primary approach but you can search for packages on official [Ubuntu repositories website](https://packages.ubuntu.com/) on Linux Ubuntu distributions (Xubuntu, Ubuntu, Lubuntu, Kubuntu, Ubuntu Bugdie and so on). Alternatively, you can also install packages with `aptitude` command if you have installed package *aptitude*. Command syntax for installing packages with aptitude is
-
- ```
- sudo aptitude install package-name
- ```
-
- #### Installation via local packages or from source code
-
- If you consider installing local packages, keep in mind that you need to track all required package dependencies. This can easily lead to [Dependency hell](https://en.wikipedia.org/wiki/Dependency_hell) situation. Therefore, installing local packages suits best for commercial, separately distributed software which are bundled with their dependencies and can be installed out-of-the-box without worrying about dependencies.
-
- All installable packages on Debian-based Linux distributions are known as **deb packages** with suffix `.deb`. Therefore, local packages can be installed with the following command:
-
- ```
- sudo dpkg -i my-deb-package.deb
- ```
-
- If any unsatisfied dependencies are present, you may consider doing as usually instructed:
-
- ```
- sudo apt-get -f install
- ```
-
- Please note that this does not always work, can break your system and make things just too troublesome to sort out. For instance, your program may depends on a previous version of a package which is already installed or your system or/and not available on the official repositories. Installing a previous version can seriously break your system. In some rare cases, packages can be offered with two versions where the older version is known as **compatibility package**, usually installing older library versions to your system, co-existing with newer ones. However, keep in mind that your `.deb` package must be aware of this **compatibility version** (so that it depends exactly on that compatibility version instead of the officially named one. This is just a naming issue).
-
- **NOTE:** You can force package installation on the system, ignoring package dependencies. In this case, you **must** know what you're doing, and this approach is really not recommended for Linux novices!
-
- If you want to compile software directly from source, you essentially need **[dh_make](https://manpages.debian.org/jessie/dh-make/dh_make.8.en.html)** and **[dpkg-buildpackage](http://man7.org/linux/man-pages/man1/dpkg-buildpackage.1.html)** commands available on your Debian-based operating system. Usually **[cmake](https://cmake.org/)**, **[make](https://en.wikipedia.org/wiki/Make_(software))** and **gcc** ([GNU Compiler Collection](https://gcc.gnu.org/)) are required as well. Not forgetting any extra **build time dependencies**, usually marked with `-dev` suffix (development headers) on Debian-based Linux distributions. **Runtime dependencies** can be described in package description.
-
- Any package dependencies (buildtime or runtime) are defined in **[Debian control file](https://www.debian.org/doc/debian-policy/ch-controlfields.html)** which can be supplied with the package or you need to create and configure it by your own.
-
- On Ubuntu, you can install most essential and widely used build time tools with:
-
- ```
- sudo apt-get install build-essential
- ```
-
- if you considered installing a remotely available package directly from source, you should find out required runtime and buildtime dependencies with (assuming you have aptitude installed):
-
- ```
- aptitude show package-name
- ```
-
- where `package-name` is the package of your choice. Replace this string with the correct name.
-
- Additionally, you can investigate required dependencies by checking any header (`.h`) files required in C/C++ source files, if the program is based on these programming languages. By tracking down required headers it is possible to figure out required dependencies in some extent. In addition, check out official websites of the program (GitHub, BitBucket or another homepage), possibly contant the developer and/or check out any supplied library files (suffix is `.so`) and their dependencies with **[ldd command](https://en.wikipedia.org/wiki/Ldd_%28Unix%29)**. On Ubuntu, you can also check out [packages.ubuntu.com](https://packages.ubuntu.com/) for dependencies if the package is available on official repositories.
-
- Please see my practical [example 1](https://github.com/Fincer/linux-server-setup/blob/master/scripts/compile-xcmenu-screenshot.sh) and [example 2](https://github.com/Fincer/winecfg_patch) for compiling software on Linux.
-
- You can also apply patches directly to source code of a program by using **[diff](https://www.gnu.org/software/diffutils/manual/html_node/Example-Unified.html)** and **[patch](https://en.wikipedia.org/wiki/Patch_%28Unix%29)** commands. Patches must be applied before compiling the program.
-
- #### Uninstallation of packages
-
- You can effectively remove packages on Debian-based Linux distributions with:
-
- ```
- sudo apt-get purge --remove package1 package2 package3
- ```
-
- In some cases, package manager suggests you to remove any orphaned packages with:
-
- ```
- sudo apt-get autoclean
- ```
-
- You can freely explore more _apt-get commands_ with:
-
- ```
- apt-get --help
- ```
-
- and by reading command-related manual page:
-
- ```
- man apt-get
- ```
-
- Manual pages in any commands are highly supported in multiple Linux distributions. The command syntax is always the same: `man my_command`. Additionally, `--help` or `-h` parameter is widely accepted by many Unix/Linux CLI programs.
-
- **NOTE:** Although Linux distributions don't have any similar to Windows registry hell (unclean registry after software removal), keep in mind that any configuration files created **afterwards** by a Linux program are not handled by Linux package managers. In other words: package managers can't track files created afterwards by your program in your `$HOME` folder. This is mostly a case with personal configuration files in user's home directory on Linux. In addition, any backup files (file suffixes: `.old`, `~`, `.bak`, `.pacnew`...) are not included in the package according to your package manager and, therefore, they may not be uninstalled by simply removing a program. [Please see my script for tracking down those files](https://github.com/Fincer/linux-server-setup/blob/master/scripts/file-and-dirs-owner.sh)
-
- #### Differences between Linux distributions
-
- **Main differences between various Linux distributions are:**
-
- - version modeling: For instance, Arch Linux follows [rolling release model](https://en.wikipedia.org/wiki/Rolling_release) whereas Ubuntu follows [time based release model](https://wiki.ubuntu.com/TimeBasedReleases)
-
- - package managers: OpenSUSE uses [zypper](https://en.opensuse.org/Portal:Zypper), Fedora uses [dnf](https://lists.opensuse.org/opensuse-factory/2017-08/msg00369.html), Arch Linux uses [pacman](https://wiki.archlinux.org/index.php/pacman)
-
- - package configurations (configuration files, features available for a program by default)
-
- - compilation methods for source codes: For instance, Arch Linux uses [makepkg](https://wiki.archlinux.org/index.php/makepkg), Ubuntu uses dpkg-buildpackage
-
- - package availability in official repositories: For instance, some packages available on Arch Linux are not available on Ubuntu
-
- - package versioning syntax: For instance, Arch Linux uses version 59.0.1-1 and Ubuntu uses 59.0.1 for a same package
-
- - package versions: For instance, Arch Linux has newer package version in the official repositories than Ubuntu does.
-
- You can read more at [Arch Linux Wiki - Arch compared to other distributions](https://wiki.archlinux.org/index.php/arch_compared_to_other_distributions).
-
- **d)** Which licenses have been used in the programs of your choice? Explain briefly which kind of rights and duties these licenses have.
- --------------
-
- **Answer:**
-
- License information can be retrieved from multiple various sources. Licensing terms have usually been mentioned in source code or documentation, help manual, program website or retriavable from equivalently trusted source.
-
- - Thunar is a part of Xfce project and licensed under GPL ([GNU General Public License](https://www.gnu.org/licenses/licenses.html#GPL)) and LGPL2.1 ([Lesser GNU General Public License](https://www.gnu.org/licenses/licenses.html#LGPL)). Detailed information about the licensing policy can be found on [Arch Linux package repository](https://www.archlinux.org/packages/extra/x86_64/thunar/), for instance.
-
- - Gedit is a part of GNOME project and licensed under GPLv2. Licensing terms are mentioned in [Gedit source code](https://git.gnome.org/browse/gedit/tree/COPYING).
-
- - Gparted is a part of GNOME project and uses GPLv2+ license, according to [the official website](http://gparted.sourceforge.net/), bottom section. Exact statement is as follows: "GParted is distributed under the GNU General Public License version 2 or (at your option) any later version."
-
- GPL license is targeted to distribute free sofware under several terms. The license grants permission to use, copy, modify and share a program and its source code. License is accumulating in nature so that any program initially released under GPL and developed further source code must be published and any further restrictions to usage of the program are forbidden. License allows commercial usage of a program. More about the license on [GNU project homepage](https://www.gnu.org/licenses/quick-guide-gplv3.html)
-
- [LGPL license](https://en.wikipedia.org/wiki/GNU_Lesser_General_Public_License) differs from GPL license so that some non-GPL licensed component of a program can be linked to otherwise GPL-licensed program. Therefore, because the program is not fully open source, it can still use LGPL license but not GPL license. LGPL licensed program has less efficient [copyleft](https://en.wikipedia.org/wiki/Copyleft).
-
- **e)** List programs you use (MS Word, for instance), purpose of these programs (for instance, text editing) and introduce equivalent open source Linux program (for instance, LibreOffice Writer). List closed source programs even if they do not have open source equivalent for Linux.
- --------------
-
- **Answer:**
-
- | Closed source program | Open source alternative | Purpose of the program | Additional notes |
- |--------------------------------------------- |--------------------------------------- |--------------------------------------------- |------------------------------------------------------------------------------------------------------------------------------------------------------------------------------------------------------------------------------------------------------------------------------------------------------------------------------------------------------------------------------------------------------------------------------------------------------------------------------------------------------------------------------------------------------------------- |
- | Adobe Acrobat | Evince | PDF document viewer | Deprecated Adobe Acrobat is also available for Linux, Professional version is only for Windows. Evince is not available for Windows. |
- | Adobe Audition | Audacity | Audio editor | |
- | Adobe Lightroom | Darktable, RawTheRapee, Digikam | Photo editor | Adobe Lightroom is available only for Windows. DigiKam is a part of KDE project. |
- | Adobe Photoshop | Krita, GIMP | Image manipulation | |
- | Adobe Premiere Pro | Kdenlive | Video editor | Kdenlive is a part of KDE project. |
- | Autodesk 3DS Max | Blender | 3D Editor | |
- | Bentley MicroStation | - | City/Urban planning oriented CAD program | Bentley Microstation is only available for Windows. |
- | IrfanView | - | Feature-rich image previewer | IrfanView is only available for Windows. |
- | MathWorks MATLAB | FreeMat, GNU Octave | Mathematical simulations & calculations | GNU Octave is a part of GNU project. |
- | Microsoft Internet Explorer, Microsoft Edge | Firefox, Palemoon, Konqueror, Falkon | Internet browser client | Konqueror and Falkon belong to KDE project. |
- | Microsoft Office, WPS Office | LibreOffice, OpenOffice, Calligra | Set of programs to process office documents | Calligra is a part of KDE project. |
- | Microsoft Outlook | Thunderbird, Kmail | Email client | Kmail is a part of KDE project. |
- | Microsoft Notepad | Kate, Leafpad, Gedit | Text editor | Kate is a part of KDE project. Gedit is a part of GNOME project. |
- | Microsoft Paint | KolourPaint | Image editor (rasterized/pixel images) | KolourPaint is a part of KDE project. |
- | Microsoft Windows | Wine, ReactOS | Operating system | Wine is a program on the top of an existing Linux/Mac OS installation. Its purpose is to translate all Windows API calls (of a Windows program) and Unix function calls (Mac OS/Linux) back and forth so that underlying Linux/Mac OS operating system can run the program without a need of the real Microsoft Windows OS. ReactOS is an open-source project which aims to replace Microsoft Windows OS as a whole, including Windows kernel (ReactOS implements its own kernel, it doesn't rely on Linux kernel). ReactOS implements parts of the Wine project. |
- | Pitney Bowes MapInfo Professional | - | Map and GIS planning | MapInfo Professional is available only for Windows. |
- | Riegl RiScan Pro | CloudCompare, MeshLab | LiDAR processing software | RiScan Pro is available only for Windows, shipped with laser scanner instruments. |
- | Skype | Ring-KDE, Pidgin Internet Messenger | Chat & video/audio calling program | Skype is available for Linux, too. However, newer version of the program is available only for Windows. Ring-KDE is a part of KDE project. It's a front-end to [GNU Ring](https://en.wikipedia.org/wiki/Ring_(software)) |
- | Valve Steam | - | Game publishing platform | |
- | Windows Control Panel | KDE System Settings (systemsettings5) | General settings of an operating system | KDE System Settings is a part of KDE project, and comes usually with KDE desktop environment. Windows Control panel is a part of Windows OS. |
- | Windows File Manager | Dolphin, Nautilus, Nemo, Thunar | File manager | Dolphin is a part of KDE project. Nautilus is a part of GNOME project. Nemo is forked from Nautilus. Thunar is a part of Xfce project. |
- | Windows Image Viewer | Gwenview | Photo previewer | Gwenview is a part of KDE project. Windows Image Viewer is a part of Windows OS. |
- | Windows Task Manager | KSysGuard, LXTask | Process and system statistics manager | KSysGuard is a part of KDE project. LXTask is a part of LXDE project. Windows Task Manager is a part of Windows OS. |
- | Windows Volume Control | Alsamixer, PulseAudio Volume Control | Audio device, level & channel control | Alsamixer is a part of ALSA. PulseAudio Volume Control is an interface to control Pulseaudio on Linux. Windows Volume Control is a part of Windows OS. |
-
- **f)** Optional extra task: backup your files (you can use an external USB storage, for instance)
- --------------
-
- **Answer:** Depending on the final goal/purpose, alternative methods can be used. Creating a backup of whole HDD/SSD's is possible with a single `dd` command (hint: use recommended command parameter `status=progress` for large partitions) and with a USB live stick so that this partition/HDD/SSD is not mounted. More sophisticated tools include [Clonezilla](https://en.wikipedia.org/wiki/Clonezilla), for instance. It is recommended to backup a server with slightly different methods.
-
- If the purpose is to copy single files from a location to another location, use `cp` or `rsync` command. [Rsync example](https://www.ostechnix.com/backup-entire-linux-system-using-rsync/).
-
- ```
- cp -Rp /mnt/my_hdd1/somefilefolder/* /mnt/my_hdd2/backupfolder/
- ```
-
- where `-R` stands for "recursive copy" and `-p` stands for "preserve file & folder permissions". Asterix symbol (*) stands for "include all files" (see [Bash regular expressions](http://tldp.org/LDP/Bash-Beginners-Guide/html/sect_04_01.html) for more information).
-
- Rsync:
-
- ```
- rsync -axHAWXS --numeric-ids --info=progress2 /mnt/my_hdd1/somefilefolder/ /mnt/my_hdd2/backupfolder/
- ```
-
- **NOTE:** If you copy files between ext2/3/4 and NTFS file systems, keep in mind that any permissions stored in ext2/3/4 partition are not preserved in NTFS partition. NTFS is widely used on Microsoft Windows environments whereas ext2/3/4 are widely used on Unix-based (POSIX) environments.
-
- In addition, you must consider any [symbolic links](https://en.wikipedia.org/wiki/Symbolic_link) included in copy process. Keep in mind to watch out user permissions as well (does the current user have permissions to copy selected files?).
-
- #### fstransform - convert existing file system to another format
-
- **NOTE:** There is an experimental tool to convert your existing ext2/3/4 & FAT/NTFS file systems to another file system format. For more information, see [fstransform - fedoramagazine.com](https://fedoramagazine.org/transform-file-systems-in-linux/) (note that installation instructions using `dnf` command are Fedora specific only. You should use `apt-get` instead on Debian/Ubuntu/Mint...)
|

