|
|
- Linux servers - Exercice 4
- ==============
-
- *Disclaimer:*
- --------------
-
- This exercise is a part of [Linux Server Administration (ICT4TN021, spring 2018) // Linux-palvelimet (ICT4TN021, kevät 2018)](http://www.haaga-helia.fi/fi/opinto-opas/opintojaksokuvaukset/ICT4TN021) school course organized as a part of Information Technology studies in Haaga-Helia university of Applied Sciences, Helsinki, Finland. Course lecturer [Tero Karvinen](http://terokarvinen.com/) has defined the original assignment descriptions in Finnish presented in this document in English. Answers and translations have been written by Pekka Helenius (me, ~ Fincer).
-
- *Table of contents:*
- --------------
-
- - [a) **Websites on the server** Make it possible to create home pages with normal user privileges in your virtual server environment.](https://github.com/Fincer/linux_server_setup/blob/master/exercises/h4.md#a-make-it-possible-to-create-home-pages-with-normal-user-privileges-in-your-virtual-server-environment)
-
- - [EXTRA: Deleting Server field from HTTP header by updating Apache source code on Debian-based Linux distributions](https://github.com/Fincer/linux_server_setup/blob/master/exercises/h4.md#extra-deleting-server-field-from-http-header-by-updating-apache-source-code-on-debian-based-linux-distributions)
-
- - [b) **Default website** Set user default website to be the default website for Apache in your virtual server environment.](https://github.com/Fincer/linux_server_setup/blob/master/exercises/h4.md#b-set-user-default-website-to-be-the-default-website-for-apache-in-your-virtual-server-environment)
-
- - [c) **Short penetration analysis** Find clues of possible penetration attempts to your web server. You can find more information about suspicious IP address without connecting them by using commands ipcalc, geoiplookup and whois, for instance.](https://github.com/Fincer/linux_server_setup/blob/master/exercises/h4.md#c-find-clues-of-possible-penetration-attempts-to-your-web-server-you-can-find-more-information-about-suspicious-ip-address-without-connecting-them-by-using-commands-ipcalc-geoiplookup-and-whois-for-instance)
-
- - [d) **Transferring website files** Create a set of websites on your local computer and copy the sites to your web server with scp command.](https://github.com/Fincer/linux_server_setup/blob/master/exercises/h4.md#d-create-a-set-of-websites-on-your-local-computer-and-copy-the-sites-to-your-web-server-with-scp-command)
-
- - [e) **PHP website** Set up a simple PHP webpage on your web server. For instance, you can print a remote address of the user ( $_SERVER['REMOTE_ADDR'] ) etc. Be careful if you use input forms of any kind.](https://github.com/Fincer/linux_server_setup/blob/master/exercises/h4.md#e-set-up-a-simple-php-webpage-on-your-web-server-for-instance-you-can-print-a-remote-address-of-the-user--_serverremote_addr--etc-be-careful-if-you-use-input-forms-of-any-kind)
-
- --------------
-
- **a)** Make it possible to create home pages with normal user privileges in your virtual server environment.
- --------------
-
- **Answer:**
-
- Virtual server IP address is `174.138.2.190`. The server is hosted on [DigitalOcean](https://www.digitalocean.com/community/tutorials/how-to-create-your-first-digitalocean-droplet) which provides hosting services for users. Ubuntu 16.04 LTS (without DE) is used as a server platform.
-
- Ubuntu distribution hosted on DigitalOcean has custom configurations compared to Canonical version of clean Ubuntu environment. For instance, DigitalOcean has predefined different repository sources in package manager sources file `/etc/apt/sources.list` (http://mirrors.digitalocean.com/ubuntu/) and has customized configuration for Apache web server by default. Can you trust these repositories and predefined configurations as a system administrator? Can you be sure the program source codes are "clean" and do not contain malicious code patches? Are the used package repositories updated and which flags have been used to compile the binary software available there? What differences are there between the official Canonical and DigitalOcean repositories?
-
- It is good to stop to think the previous issues before looking for a third party hosting service for your server environment. Do available markets have better virtual hosting service providers and in which criteria? In small business, it can be safer to hold all the aces and set up a minimal self-hosted server using a computer (suited for your needs) such as Raspberry Pi and claim a Domain name for it from a DNS provider. If you do larger business, you need to consider your server capacity again. It can be more profitable and comfortable to buy some server space from a virtual hosting server provider.
-
- Of course, if you ever want to, you can install the server environment from scratch using rolling releases such as Arch Linux, Gentoo or 'Linux from Scratch'. However, this is not recommended approach in server environments requiring system stability over newer software. The downside is that some new features or bug/security fixes may not be implemented in older software, so keep that in mind. Some major project, however, backport security fixes to older software versions, too.
-
- Anyway,
-
- **1.** Do initial configuration for your server following the guide by Tero Karvinen:
-
- [Tero Karvinen - First Steps on a New Virtual Private Server – an Example on DigitalOcean and Ubuntu 16.04 LTS](http://terokarvinen.com/2017/first-steps-on-a-new-virtual-private-server-an-example-on-digitalocean)
-
- **2.** Connect to your new virtual private server once you have set it up. I use a predefined user name `newuser` in my server environment:
-
- ```
- phelenius@my-machine:~$ ssh newuser@174.138.2.190
- newuser@174.138.2.190's password:
- Welcome to Ubuntu 16.04.3 LTS (GNU/Linux x86_64)
-
- * Documentation: https://help.ubuntu.com
- * Management: https://landscape.canonical.com
- * Support: https://ubuntu.com/advantage
-
- Get cloud support with Ubuntu Advantage Cloud Guest:
- http://www.ubuntu.com/business/services/cloud
-
- 7 packages can be updated.
- 0 updates are security updates.
-
-
- Last login: Tue Feb 13 14:49:24 2018 from XXX.XXX.XXX.XXX
- newuser@goauldhost:~$
- ```
-
- **3.** Open default SSH TCP port 22 in your firewall:
-
- **NOTE:** Default policy for Ubuntu firewall is to deny/drop all input connections so we need to allow traffic into protocol/daemon specific ports to open up communication between this server and clients.
-
- ```
- newuser@goauldhost:~$ sudo ufw allow 22/tcp && sudo ufw enable
- ```
-
- Once you have established SSH connection to your remote server, install `apache2` package and open port `80` for it by doing the following:
-
- ```
- newuser@goauldhost:~$ sudo apt-get install apache2 && sudo ufw allow 80/tcp
- ```
-
- **4.** Enable Apache `userdir` module:
-
- ```
- newuser@goauldhost:~$ sudo a2enmod userdir
- ```
-
- **5.** Some PHP and userdir module related configurations seem to be predefined in packages provided on DigitalOcean server environment (such as `#` symbols in `/etc/apache2/mods-enabled/php7.0.conf` in order to enable PHP for user sites), unlike stated in [Exercise 3](https://github.com/Fincer/linux_server_setup/blob/master/exercises/h3.md).
-
- **6.** Restart Apache HTTP daemon (HTTPD) after enabling `userdir` module:
-
- ```
- newuser@goauldhost:~$ sudo systemctl restart apache2.service
- ```
-
- Recheck HTTP daemon state (should return `active`):
-
- ```
- newuser@goauldhost:~$ systemctl is-active apache2.service
- ```
-
- If everything seem to be running and working you can try to establish connection to the HTTP daemon server using **your local computer** (do not try this in your virtual private server environment but with an external client computer):
-
- ```
- phelenius@my-machine:~$ xdg-open http://174.138.2.190:80
- ```
-
- The IP address here refers to the virtual private server IP address.
-
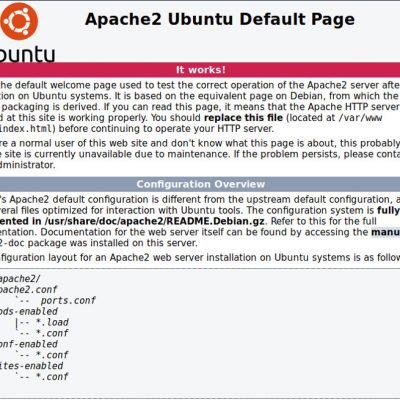
- **7.** If the connection test is successful, you should see something similar to this picture:
-
- 
-
- Let's get back to the virtual server environment in our SSH session.
-
- **8.** We should hide any extra server information which is visible for clients. Add the following lines in `/etc/apache2/apache2.conf` (with sudoedit):
-
- ```
- TraceEnable Off
- ServerSignature Off
- ServerTokens Prod
- ```
-
- Description of these lines [here](https://www.petefreitag.com/item/419.cfm).
-
- Restart Apache HTTP daemon (web server):
- ```
- newuser@goauldhost:~$ sudo systemctl restart apache2.service
- ```
-
- **9.** Create a new user `monkey` (finnish: apina). We do not add this user to `sudo` groups, therefore denying all root access for this user:
-
- ```
- newuser@goauldhost:~$ sudo adduser monkey
- ```
-
- or equivalently:
-
- ```
- newuser@goauldhost:~$ sudo useradd --create-home --shell /bin/bash --user-group --uid 1006 --comment "Monkey account" --password "insert_password_here" monkey
- ```
-
- where
-
- - `/bin/bash` is the default shell for the new user
-
- - `1006` is the UID number for the new user. Feel free to change
-
- - `"Monkey account"` is so called "friendly" name of the account (usual syntax is: `first name surname`)
-
- - `"insert_password_here" is the password for the new user`
-
- - `monkey` is the (system) name for the new user
-
- **NOTE:** Not all Linux distributions ship with executable (wrapper) script `adduser`. In this case, either `adduser` must be installed or more primitive (but default/standard) command `useradd` should be used instead.
-
- Now, change to the default shell of user `monkey` (you can check it by executing: `grep monkey /etc/passwd`):
-
- ```
- newuser@goauldhost:~$ su monkey
- Password:
- monkey@goauldhost:/home/newuser$ cd
- monkey@goauldhost:~$ mkdir public_html
- ```
-
- Therefore we have created a new home site folder for the user `monkey`. Contents of this folder should be available like shown in the following picture:
-
- 
-
- **NOTE:** As you can see, Apache doesn't give any server information in the website view, thanks for the configurations done in step 8 above.
-
- User `monkey` can add any content to his/her personal site. By default, Apache looks for any of the following files, defined in `/etc/apache2/mods-available/dir.conf` (symbolic link in folder `/etc/apache2/mods-enabled/dir.conf`):
-
- ```
- newuser@goauldhost:~$ ls -l /etc/apache2/mods-enabled/dir.conf
- lrwxrwxrwx 1 root root 26 Feb 8 10:40 /etc/apache2/mods-enabled/dir.conf -> ../mods-available/dir.conf
- newuser@goauldhost:~$ cat /etc/apache2/mods-enabled/dir.conf |grep -i directoryindex | awk '{$1 = ""; print $i}'
- index.html index.cgi index.pl index.php index.xhtml index.htm
- ```
-
- Permissions of folder `$HOME/public_html` of the user `monkey` are as follows:
-
- ```
- monkey@goauldhost:~$ stat -c "Owner: %U (user), %G (group), perms: %a // %A" $HOME
- Owner: monkey (user), monkey (group), perms: 775 // drwxrwxr-x
- ```
-
- or alternatively:
-
- ```
- monkey@goauldhost:~$ ls -l
- total 4
- drwxrwxr-x 2 monkey monkey 4096 Feb 13 15:35 public_html
- ```
- drwxrwxr-x
- 123456789 10
-
- d = directory
- r = read (value 4)
- w = write (value 2)
- x = execute (value 1)
-
- where
- ...symbols 2-4 (rwx) indicate permissions of the user `monkey` to the folder
- ...symbols 5-7 (rwx) indicate permissions of the (primary) group where the user `monkey` belongs to. In this case, the group is `monkey`
- ...symbols 8-10 (r-x) indicate permissions granted for other system users to the folder
-
- Permissions can be written in numeric form but also in symbolic form. For instance,
-
- ```
- 775 = rwxrwxr-x (4+2+1, 4+2+1, 4+1)
- ug=rwx,o=rx => rwxrwxr-x
- ```
-
- Take a look on the following links to get more information about Unix permissions:
-
- - [Arch Wiki - File permissions and attributes](https://wiki.archlinux.org/index.php/File_permissions_and_attributes)
-
- - [Wikipedia - Notation_of_traditional_Unix_permissions](https://en.wikipedia.org/wiki/File_system_permissions#Notation_of_traditional_Unix_permissions)
-
- - [Arch Wiki - umask](https://wiki.archlinux.org/index.php/Umask)
-
- Changing permissions is recommended to be done in symbolic mode because individual permissions can't be as flexibly be changed in numeric mode.
-
- `ls` command shows user (`monkey`) first after which group (`monkey`) is shown.
-
- The folder is accessible in public network via address `http://174.138.2.190:80/~monkey/`
-
- You can change above defined permissions with `chmod` command.
-
- - Numeric form: `chmod 775 ~/public_html`
-
- Symbolic form: `chmod ug=rwx,o=rx ~/public_html`
-
- **NOTE:** You can change permissions recursively using `-R` parameter (`chmod -R ...`)
-
- ### EXTRA: Deleting Server field from HTTP header by updating Apache source code on Debian-based Linux distributions
-
- Including Server field in HTTP header by Apache HTTP daemon (web server) is debated. [HTTP/1.1 standard specification](https://tools.ietf.org/html/rfc2616#page-141) states the following:
-
- > Note: Revealing the specific software version of the server might allow the server machine to become more vulnerable to attacks against software that is known to contain security holes. Server implementors are encouraged to make this field a configurable option.
-
- **NOTE:** Apache must be compiled from source code.
-
- Removal of Server field from HTTP header is debated in Apache developers' community (The key question here: does removal of the field actually improve any security?). More about this topic: [StackoverFlow (Can't remove Server: Apache header)](https://stackoverflow.com/questions/35360516/cant-remove-server-apache-header).
-
- **NOTE:** The following method does not work with automatic system updates via package repositories (usage of `sudo apt-get update` and `sudo apt-get upgrade` commands) because the patches binary files would be replaced by ones available in the official repositories. Therefore, each time you want to update your Apache server, you need to recompile it from source applying the patch file provided in this GitHub repository. **This method can be troublesome for system administration or contain unaccepted policy in your company. Consider using Puppet/Ansible/Chef/SaltStack or any relevant management to automate method described here.**
-
- **NOTE:** You must be aware what you are doing each time you compile software from source. Trust the source, trust the patch files (suffixes `.diff` and `.patch`) and do not do anything that can lead to unknown or troublesome bugs, malicious code execution or create new security risks.
-
- **NOTE:** We are unable to sign the package with the official maintainer key because we update Apache with our specific patch file and compile the software ourselves. Therefore we ignore any signing requirements in `dpkg-buildpackage` command (or alternatively we can use our own keys).
-
- **NOTE** Consider any policy that determines your production and/or server environment requirements. For instance: Am I allowed to install software from source code? Does my method break a (critical) component in working server environment? Etc.
-
- **NOTE: Again. Know exactly what you are about to do. As a system administrator you hold responsibility here. Do not get fired.**
-
- We have already improved security of our Apache web server by removing critical information sent to client. However, the server still gives information about its name as follows:
-
- ```
- newuser@goauldhost:~/source_codes/apache2$ curl -I http://localhost
- HTTP/1.1 200 OK
- Date: Sat, 17 Feb 2018 13:27:11 GMT
- Server: Apache
- Content-Type: text/html;charset=UTF-8
- ```
-
- We want to remove field `Server: Apache`. Multiple approaches were tested (such as `modsecurity2` module and writing line `Header unset Server` into file `/etc/apache2/apache2.conf`) without success. Therefore I ended up patching the source code of Apache web server so that the wanted field can really be removed.
-
- Download Apache source code on your Debian-based Linux distribution:
-
- ```
- newuser@goauldhost:~$ mkdir -p ./source_codes/apache2 && cd ./source_codes/apache2
- newuser@goauldhost:~/source_codes/apache2$ apt-get source apache2
- ```
-
- After which add [source code patch file](https://github.com/Fincer/linux_server_setup/blob/master/patches/patch_apache_servertokens.patch) into created `$HOME/source_codes/apache2` folder.
-
- **NOTE:** I have personally created the patch file with Unix tool `diff`. The patch file is not downloaded from any suspicious website. You can always check & analyse the patch file code yourself if still hesitating.
-
- If you have a working Apache HTTP daemon (web server) environment on your Linux, please check the version of your Apache software version with the following command before compiling & installing a custom-patched Apache version:
-
- ```
- newuser@goauldhost:~$ dpkg -s apache2 |grep -i version
- Version: 2.4.18-2ubuntu3.5
- ```
-
- In that way we can be sure version of the downloaded source code matches with our already-installed/existing Apache environment.
-
- Once you have downloaded the source code, go to the following folder (which contains the code):
-
- ```
- newuser@goauldhost:~/source_codes/apache2$ cd apache2-2.4.18/
- ```
-
- Implement the patch file changes into the Apache source code:
-
- ```
- newuser@goauldhost:~/source_codes/apache2/apache2-2.4.18$ patch -Np1 -i ../patch_apache_servertokens.patch
- ```
-
- Before compiling Apache web server, you must install the following build time dependencies:
-
- ```
- newuser@goauldhost:~/source_codes/apache2/apache2-2.4.18$ sudo apt-get install debhelper libaprutil1-dev libapr1-dev libpcre3-dev zlib1g-dev libssl-dev liblua5.1-0-dev libxml2-dev autotools-dev build-essential
- ```
-
- Compile and install the Apache web server:
-
- newuser@goauldhost:~/source_codes/apache2/apache2-2.4.18$ dpkg-buildpackage -rfakeroot -b -us -uc
- ...
- <compiling source code>
- ...
- <source code compiled and archived as new deb packages>
- ```
-
- If Apache HTTP daemon is running, stop it:
-
- ```
- newuser@goauldhost:~/source_codes/apache2$ sudo systemctl stop apache2.service
- ```
-
- It is essential to check which apache2 packages have been installed into the target system. We want to install only specific deb packages already found in the system, as multiple deb packages have been compiled by the previous command. All found Apache2 packages in the system should be replaced by the ones compiled from the Apache2 source code.
-
- System has the following Apache2 packages:
-
- ```
- newuser@goauldhost:~/source_codes/apache2/apache2-2.4.18$ cd ..
- newuser@goauldhost:~/source_codes/apache2$ dpkg --get-selections |grep apache | awk '{print $1}'
- apache2
- apache2-bin
- apache2-data
- apache2-utils
- libapache2-mod-php
- libapache2-mod-php7.0
- ```
-
- Then we compare the above list to the compiled deb packages:
-
- ```
- newuser@goauldhost:~/source_codes/apache2$ ls |grep deb
- apache2_2.4.18-2ubuntu3.5_amd64.deb
- apache2_2.4.18-2ubuntu3.5.debian.tar.xz
- apache2-bin_2.4.18-2ubuntu3.5_amd64.deb
- apache2-data_2.4.18-2ubuntu3.5_all.deb
- apache2-dbg_2.4.18-2ubuntu3.5_amd64.deb
- apache2-dev_2.4.18-2ubuntu3.5_amd64.deb
- apache2-doc_2.4.18-2ubuntu3.5_all.deb
- apache2-suexec-custom_2.4.18-2ubuntu3.5_amd64.deb
- apache2-suexec-pristine_2.4.18-2ubuntu3.5_amd64.deb
- apache2-utils_2.4.18-2ubuntu3.5_amd64.deb
- ```
-
- ... as a result we can see that the following deb packages should be installed with `dpkg -i` command:
-
- ```
- newuser@goauldhost:~/source_codes/apache2$ sudo dpkg -i apache2_2.4.18-2ubuntu3.5_amd64.deb apache2-bin_2.4.18-2ubuntu3.5_amd64.deb apache2-data_2.4.18-2ubuntu3.5_all.deb apache2-utils_2.4.18-2ubuntu3.5_amd64.deb
- ```
-
- If everything has succeeded you should have a working, patched Apache web server in your target system. Because the patches web server software supports `ServerTokens None` option now, we shall add this option into `/etc/apache2/apache2.conf`.
-
- ```
- newuser@goauldhost:~$ sudoedit /etc/apache2/apache2.conf
- ```
-
- Add the following lines (// just replace `ServerTokens Prod` with `ServerTokens None`):
-
- ```
- TraceEnable Off
- ServerSignature Off
- ServerTokens None
- ```
-
- **NOTE:** Any settings in `/etc/apache2/conf-available/security.conf` overrides these configuration changes.
-
- Restart Apache2 server (you must apply the patch file before doing this because the default Apache software does not implement `None` for ServerTokens):
-
- ```
- newuser@goauldhost:~$ sudo systemctl start apache2.service
- ```
-
- Check whether the configuration works:
-
- ```
- phelenius@my-machine:~$ curl -I http://174.138.2.190
- HTTP/1.1 200 OK
- Date: Sat, 17 Feb 2018 14:02:20 GMT
- Last-Modified: Wed, 14 Feb 2018 00:06:44 GMT
- ETag: "20b-56520e2f88f4a"
- Accept-Ranges: bytes
- Content-Length: 523
- Vary: Accept-Encoding
- Content-Type: text/html
- ```
-
- Therefore we have successfully deleted Server field from HTTP header.
-
- You can additionally set and unset more HTTP header fields sent to a client as follows:
-
- ```
- Header unset Last-Modified
- Header unset Accept-Ranges
- Header unset Vary
- Header unset ETag
- ```
-
- **NOTE:** You must be careful when unsetting fields because it affects behavior of client programs and efficiency of your server environment (performance, for instance). Remember that factors such as field order, formatting and error messages can give hints about the used server environment as well (for instance, 404 not found message).
-
- **NOTE:** The header options mentioned above work only if module `headers` has been activated (run command `sudo a2enmod headers` and restart the Apache server)
-
- More about HTTP header syntax in [Wikipedia](https://en.wikipedia.org/wiki/List_of_HTTP_header_fields). More articles in [ETag](https://en.wikipedia.org/wiki/HTTP_ETag), [Vary: Accept-Encoding](https://blog.stackpath.com/accept-encoding-vary-important), etc.
-
- **b)** Set user default website to be the default website for Apache in your virtual server environment.
- --------------
-
- **Answer:**
-
- Let's begin from the final state of the previous answer. We have created a user `monkey` in our server computer. This user has a website URL `174.138.2.190:80/~monkey` which is accessible outside the server computer, too.
-
- **1.** Remove default webpage of Apache web server, and move `DocumentRoot` to point to directory `$HOME/public_html` of user `monkey`, after which restart Apache service daemon.
-
- ```
- newuser@goauldhost:~$ sudo sed -i 's?DocumentRoot /var/www/html?DocumentRoot /home/monkey/public_html?' /etc/apache2/sites-available/000-default.conf
- ```
-
- We can disable folder path `/var/www` commenting out the following lines (inserting `#` comment symbols) in file `/etc/apache2/apache2.conf` (use command `sudoedit /etc/apache2/apache2.conf`, for instance):
-
- ```
- #<Directory /var/www/>
- # Options Indexes FollowSymLinks
- # AllowOverride None
- # Require all granted
- #</Directory>
- ```
-
- Restart Apache web server daemon:
-
- ```
- newuser@goauldhost:~$ sudo systemctl restart apache2.service
- ```
-
- Go to the following IP address with your **local computer** (use HTTP port `80`):
-
- ```
- xdg-open http://174.138.2.190:80
- ```
-
- The opening view should be as follows:
-
- 
-
- **2.** Create a new file `index.html` in the directory `$HOME/public_html` of user `monkey` (where `$HOME is folder path `/home/monkey/`)
-
- ```
- newuser@goauldhost:~$ su monkey
- Password:
- monkey@goauldhost:/home/newuser$ cd
- monkey@goauldhost:~$ echo -e '<!DOCTYPE html>\n <html>\n \t<head>\n \t\t<title>Testi</title>\n \t</head>\n \t<body>\n \t\t<h1>Testi</h1>\n \t</body>\n </html>\n' > ~/public_html/index.html
-
- ```
-
- **3.** We should redirect all `index.html` traffic to the folder root `/home/monkey/public_html/`. This can be achieved by creating hidden page-related control file `.htaccess` file to the directory root.
-
- ```
- monkey@goauldhost:~$ cd public_html
- monkey@goauldhost:~/public_html$ touch .htaccess
- monkey@goauldhost:~/public_html$ echo -e '<IfModule mod_rewrite.c>\n\tRewriteEngine On\n\tRewriteBase /\n\tRewriteRule ^index\.html$ / [NC,R,L]\n</IfModule>' | tee -a ./.htaccess
- ```
-
- Reactivate Apache module `rewrite`. We shall switch our user because user `monkey` doesn't have `sudo` rights at this point:
-
- ```
- monkey@goauldhost:~/public_html$ su newuser
- Password:
- newuser@goauldhost:/home/monkey/public_html$ sudo a2enmod rewrite
- Enabling module rewrite.
- To activate the new configuration, you need to run:
- service apache2 restart
- newuser@goauldhost:/home/monkey/public_html$ sudo systemctl restart apache2.service
- ```
-
- Your Apache web server should redirect all traffic of `http://174.138.2.190:80/index.html` to address `http://174.138.2.190:80/`
-
- **c)** Find clues of possible penetration attempts to your web server. You can find more information about suspicious IP address without connecting them by using commands ipcalc, geoiplookup and whois, for instance.
- --------------
-
- **Answer:**
-
- The key principle to check any malicious activity is to check system log files, mainly `/var/log/apache/access.log` and `/var/log/apache/error.log` (Apache). Malicious SSH attempts may be checked in `/var/log/auth.log`. Other relevant log files must be considered as important, too.
-
- At the time of writing this answer, the Apache web server was running bit over a week period. However, there were no any webpage deployed during that time, and therefore my web server hadn't created any major log entries. However, I noticed one suspicious connection attempt to setup.php file of phpMyAdmin software, although the software was not installed. The lookup was done by checking web server log file `/var/log/apache2/access.log`. The log entry itself was as follows:
-
- ```
- 66.118.142.165 - - [13/Feb/2018:14:43:58 +0000] "HEAD /phpmyadmin/scripts/setup.php HTTP/1.0" 404 159 "-" "-"
- ```
-
- We shall analyze the logged IP address (+ download a georeferred IP database to determine more specific geolocation of the source by using `wget` command):
-
- ```
- newuser@goauldhost:~$ sudo apt-get -y install geoip-bin
- newuser@goauldhost:~$ wget http://geolite.maxmind.com/download/geoip/database/GeoLiteCity.dat.gz
- newuser@goauldhost:~$ gunzip GeoLiteCity.dat.gz
- newuser@goauldhost:~$ OBSIP=66.118.142.165
- newuser@goauldhost:~$ echo -e "Server Geolocation:\n$(geoiplookup -f /home/newuser/GeoLiteCity.dat $OBSIP)\n\n$(nslookup $OBSIP)\n\nDNS Name:\n$(dig +short -x $OBSIP)" && unset OBSIP
- ```
-
- Output is as follows:
-
- ```
- Server Geolocation:
- GeoIP City Edition, Rev 1: US, FL, Florida, Tampa, 33611, 27.886700, -82.511703, 539, 813
-
- Server: 67.207.67.2
- Address: 67.207.67.2#53
-
- Non-authoritative answer:
- 165.142.118.66.in-addr.arpa name = 66-118-142-165.static.sagonet.net.
-
- Authoritative answers can be found from:
-
- DNS Name:
- 66-118-142-165.static.sagonet.net.
-
- ```
-
- The log entry tells us that connection to page `http://174.138.2.190:80/phpmyadmin/scripts/setup.php` was tried to be established. The server responded with code 404 (HTTP_NOT_FOUND), indicating that the address couldn't be found. It is seen that user agent string of `66.118.142.165` is empty (just a line). It is known that the user agent string can very easily be customized.
-
- HTTP [HEAD method](http://condor.depaul.edu/dmumaugh/readings/handouts/SE435/HTTP/node14.html) were used in the connection attempt. The HTTP HEAD method is more suitable for quick file existence look-ups than HTTP GET method because only the file existence is checked, leading to decreased data transfer rates between a server and a client. The HEAD method is usually used for caching documents (data). A client program just tries to download metadata of the request document from a server. [Apache web server does not return the message response body while answering to the client program with the HTTP HEAD method.](https://hc.apache.org/httpclient-3.x/methods/head.html).
-
- the HEAD method can be "disabled" by adding the following lines into 1) file `~/public_html/.htaccess` (in the case of this assignment) 2) or into file `/etc/apache2/sites-available/000-default.conf` 3) or any site-specific configuration file in Apache's `sites-available` folder 4) or any `.htaccess` file in a website directory root:
-
- ```
- RewriteEngine on
- RewriteCond %{THE_REQUEST} !^(POST|GET)\ /.*\ HTTP/1\.1$
- RewriteRule .* - [F,L]
- ```
-
- The original answer [here](https://www.linuxquestions.org/questions/linux-security-4/disabling-head-options-http-methods-in-apache-webserver-763347/#post4511023)
-
- It is understandable that line `RewriteEngine on` doesn't need to be determined twice and adding this code requires re-enabling of Apache rewrite module.
-
- I have had a Debian-based web server (LAMP) environment in the past years. I have included Apache `/var/log/apache/access.log` parts of that web server environment here (year 2014):
-
- [Apache - access.log, example](https://github.com/Fincer/linux_server_setup/blob/master/other/apache-log-sample)
-
- The log file reveals many suspicious connection attempts from Thailand and Netherlands, for instance.
-
- The most memorable log entry from the past years was, however, a penetration attempt by Romanian hacker/bot group and it looked like as follows:
-
- ```
- 4.125.148.79 - - [07/Aug/2013:20:53:35 +0400] "GET /w00tw00t.at.blackhats.romanian.anti-sec:) HTTP/1.1" 404 142 "-" "ZmEu"
- ```
-
- **d)** Create a set of websites on your local computer and copy the sites to your web server with scp command.
- --------------
-
- **Answer:**
-
- **1.** Let's create the required websites locally, after which the upload is done with user `newuser`. I have used pre-created websites in this assignment. The upload is done with my Arch Linux computer using required SSH protocol:
-
- ```
- [13/02/2018 21:04:16 - fincer: ~ ]$ scp /home/fincer/Documents/website/website_1.03_fincer.zip newuser@174.138.2.190:./
- The authenticity of host '174.138.2.190 (174.138.2.190)' can't be established.
- ECDSA key fingerprint is SHA256:XXXXXXXXXXXXXXXXXXXXXXXXXXXXXXXXXXXXXXXXXXX.
- Are you sure you want to continue connecting (yes/no)? yes
- Warning: Permanently added '174.138.2.190' (ECDSA) to the list of known hosts.
- newuser@174.138.2.190's password:
- website_1.03_fincer.zip 100% 656KB 655.8KB/s 00:01
- [13/02/2018 21:04:32 - fincer: ~ ]$
- ```
-
- **2.** Modify Apache default webpage address to point to `/home/newuser/public_html/`:
-
- ```
- newuser@goauldhost:~$ sudo sed -i 's?DocumentRoot /home/monkey/public_html?DocumentRoot /home/newuser/public_html?' /etc/apache2/sites-available/000-default.conf
- newuser@goauldhost:~$ sudo systemctl restart apache2.service
- ```
-
- **3.** Because `/home/newuser/public_html/` is empty (checked with `ls` command), we shall extract uploaded `website_1.03_fincer.zip` to that directory.
-
- ```
- newuser@goauldhost:~$ sudo apt-get update && sudo apt-get install unzip
- newuser@goauldhost:~$ mv website_1.03_fincer.zip ./public_html/ && cd ./public_html
- newuser@goauldhost:~$ unzip website_1.03_fincer.zip
- ```
-
- **4.** It should be possible to open the website using URL `174.138.2.190`, and the website should look like the following:
-
- 
-
- **5.** Let's copy another website sample into folder `$HOME/public_html/` of user `monkey`:
-
- ```
- [13/02/2018 22:01:40 - fincer: ~ ]$ scp /home/fincer/Documents/server_site.tar.xz monkey@174.138.2.190:./public_html/
- ```
-
- **6.** Let's establish a new SSH connection to the virtual server computer with user `monkey`:
-
- ```
- [13/02/2018 22:04:23 - fincer: ~ ]$ ssh monkey@174.138.2.190
- ```
-
- **7.** In the virtual web server computer terminal, go to `$HOME/public_html/` of user `monkey`, extract `server_site.tar.xz` and put the extracted files into correct places in the directory hierarchy. Rename old `index.html` file to `index.html.old`
-
- ```
- monkey@goauldhost:~/public_html$ mv index.html index.html.old
- monkey@goauldhost:~/public_html$ tar xf server_site.tar.xz
- monkey@goauldhost:~/public_html$ mv ./server_site/* ./
- monkey@goauldhost:~/public_html$ rm -Rf ./{server_site,server_site.tar.xz}
- ```
-
- (you could have just used one * symbol in the previous rm command because the equal name syntax, i.e. `rm -Rf ./server_site*`)
-
- The deployed website can be viewed in URL address `http://174.138.2.190:80/~monkey`, and they look as follows (this example is a work time // wage calculator):
-
- 
-
- **NOTE:** There are differences in the URL due to language reasons (`~apina` translates from finnish to english as `~monkey`)
-
- **e)** Set up a simple PHP webpage on your web server. For instance, you can print a remote address of the user ( $_SERVER['REMOTE_ADDR'] ) etc. Be careful if you use input forms of any kind.
- --------------
-
- **Answer:**
-
- In this answer, I add a PHP-based BMI calculator (Body Mass Index) to my website. For this purpose, two files were created: `bmicalc.html` and `bmicalc.php` which both are uploaded to the virtual web server with the following command, executed at the **local computer**:
-
- ```
- phelenius@my-machine:~$ scp $HOME/public_html/bmi-index/{bmicalc.php,bmicalc.html} newuser@174.138.2.190:./public_html/
- newuser@174.138.2.190's password:
- bmicalc.php 100% 3051 3.0KB/s 00:00
- bmicalc.html 100% 523 0.5KB/s 00:00
- ```
-
- The following image demonstrates a web browser view of URL address `174.138.2.190/bmicalc.html`.
-
- - On the left side: the source code of the HTML page.
-
- - On the right side: server-side "raw" PHP source code which is not seen by the client program, our web browser in this case (PHP code = server-side execution, i.e. only web server sees the code, JavaScript code = client-side execution, i.e. client can see the code, too)
-
- 
-
- **Edit** The following changes has been done after answering the assignment:
-
- - PHP-related HTTP method GET has been changed to POST method afterwards because usage of the GET method leads to visible input values in a web browser URL field. This doesn't happen when using the POST method.
-
- - Implementation of server-side solutions which restrict user accessibility to other web server directories and files.
-
- - PHP code has been merged with the HTML document, i.e. there is no additional `.php` file in the web server anymore.
|

